The following are the no-bake resin sand operating procedures and instructions drafted by sanzhuji and the foundry for reference.
1. No-bake resin sand modeling process rules
1.1 The proportion and performance of molding sand
1.2 Continuous sand mixer sand ratio: 100% old sand + curing agent 0.55~0.65% + resin 1.1~1.2%
1.3 The sand ratio of the roller sand mixer: new sand 100% + curing agent 0.55~0.65% + resin 1.2~1.3%
1.4 Sand performance of continuous sand mixer: the appropriate strength of molding sand is 6~8kg
1.5 Sand performance of roller sand mixer: the strength of molding sand is 7~2㎏.
1.6 Other requirements
1.61 The moisture content of new sand should be ≦0.25%
1.62 The mud content of molding sand should be ≦1%
1.63 Sand temperature in winter≦20℃; sand temperature in summer≦40℃
1.64 The amount of resin and curing agent added should be checked every 2 to 3 days
2. Preparation
The operator first looks and whether the working surface of the core box is flat and smooth, whether there is damage, whether there is any missing piece, factory mark and heat number, whether the positioning pin is missing, firm, pouring riser, whether the cold iron is complete, etc., and Prepare the squeegee, air eye needle and other tools. If they do not meet the requirements, they must repair the integrated grid before production. The heat number is changed every heat.
The operator must spray and demold the pattern and core box before the modeling work.
Spraying with air source or brushing with a brush, the release agent should be evenly applied, and there should be no serious release agent accumulation, and the modeling operation can be carried out after the release agent is basically dry.
The operator or maintenance worker inspects the continuous sand mixer, mainly checking whether there is sand in the sand bin, whether the resin and curing agent are sufficient, whether the electrical, gas, and mechanical parts of the equipment are intact. If they do not meet the requirements, they must repair the integrated grid. in production.
3. Modeling operation
3.1 Putting the box: The operator hoisting the sand box on the mold plate, pay attention to whether the direction of the round and square bushings of the sand box is correct, and whether the sand box bushings are complete, and arrange for inspection by personnel to prevent round and square bushings. The direction is wrong and no sandbox bushings are produced. and check whether the mouth of the sand box is flat, and there must be no molten iron on the mouth of the box. If there is any need to use a grinder to smooth it before use, the sand box should be placed in place and combined with the surface of the template.
3.2 Preparation: The operator puts the pouring riser, cold iron, core iron, live block, etc. in the correct position of the shape and core box. Remove the sticky sand on the pouring riser rod and check whether the positioning part of the pouring riser rod is qualified. Check whether the surface of the cold iron is severely corroded. If necessary, use the cold iron after shot blasting.
3.3 Sand filling: The operator starts the continuous sand mixer, and the initial molding sand should be placed on the ground, and must not be placed in the sand box and core box (putting it will cause this part of the sand to not solidify), and the operator should wear gloves during operation Operation, because the curing agent is corrosive to the skin. The operator should use wooden sticks or other tools to compact the sand in the sand box and core box, and there should be no serious loose sand phenomenon. When the sand box and core box are filled with sand, use a scraper to smooth the sand. When filling the next sand box and core box, use the container to catch the sand discharged from the sand mixer to avoid cost waste.
3.4 Sand-piercing air eye: When the upper box is used to pierce the air eye, use a Φ3-5mm round air eye needle to pierce the air eye. Do not pierce the upper surface of the mold. The distance between the air eye needle and the upper surface of the mold is 30-40 mm. , In the core head part of the pattern, use a Φ8-12mm air eye needle to pierce the surface of the core head for the sand core to vent air. The air holes are arranged at an interval of 40-60 mm. When the lower box pierces the air eye, the size and arrangement of the air eye are the same as the upper box, and the depth of the air eye should be controlled at a distance of 50-70 mm from the surface of the pattern. Pay attention to the depth not to pierce the working surface of the appearance, so as to avoid casting defects such as hot metal running out and sinking to the bottom.
3.5 Take out the pouring riser and live block: when the molding sand is basically solidified, take out the pouring riser and live block.
3.6 Emptying the sand mixer: At the end of each round of sand mixing, the operator should empty the sand mixer, otherwise it will cause the molding sand to solidify in the sand mixer, and the machine cannot be started when the machine is turned on next time and cause the sand mixer to malfunction. .
3.7 When sanding the core by hand, be careful not to violently hit the edge of the core box with a wooden hammer to prevent damage to the core box. Be careful not to perform forced ejection, and do not perform the ejection operation for the sand mold and core of the day the next day. Take out the movable block on the mold and core box from the sand mold, and place it in the correct position of the mold and core box. The sand molds and cores should be placed steadily, and the upper and lower sand molds should be stacked with wooden boards or other things. If the sand mold has sand loss or other defects, it should be repaired with special repairing paste as much as possible, and the mold shall be hung in a special area and placed in a special area. When a sand box bushing is dropped, use the correct bushing to place it in place.
3.8 Preparation for the next round of work: clean up the floating sand and sand blocks on the pattern plate, mold and core box, check whether the movable block, mold and core box are correct and in place, if the sand mold has sand sticking phenomenon, carry out Spray release agent.
4. Organize the scene
4.1 Open and clean up the sand mixer when you are off work, especially clean up the mixing piece and the accumulated sand on the mixing machine, and coat it with a release agent.
4.2 Put the tools and loose pieces in accordance with the regulations of fixed management, clean up the site for sanitation, and transport the waste sand to the designated location.
5. No-bake resin sand packing process rules
5.1 Performance requirements of alcohol-based coatings:
5.2 The density of the coating is required to be 1.18~1.25g/cm3
5.3 Suspension of paint ≥85~90%
5.4 The conditional viscosity of the coating is 6~12s
6. Trim the sand core and sand mold
6.1 The transfer of sand cores, the combination personnel use special work tools to transfer the sand cores from the core storage area to the combination area
6.2 According to the specific requirements of each casting sand core, check the quality of the sand core, trim the qualified and intact sand core, remove the sharp sand of the sand core, and repair the broken part of the sand core with a special repair paste Good, use resin sand to repair the areas where the crack is large, and repair the exposed parts of the sand core core iron with repairing paste. The working surface of the sand core should not have exposed core iron.
6.3 The trimmed sand core shall be discharged neatly as required.
7. Brush
7.1 Use paint types as required by technicians, such as zircon powder paint or composite paint.
7.2 The coating surface is smooth, without obvious brush marks, clear edges and corners, and no dust leakage (especially the umbilicus, ribs, and dead corners).
7.3 The thickness of the coating should be 0.5~1mm, and the sand-adhesive parts should be painted at least twice. The pouring and riser system should be painted with the same paint as other working surfaces of the sand mold without missing.
After the sand core and sand mold after the coating are placed in a stable position, immediately ignite the coating. When igniting the coating, pay attention to safe operations and do not cause a fire, especially in the summer season. coating. Then check the working surface of the sand core and sand mold for paint accumulation and flow coating failure. If scraping and repairing are required, the paint should be ignited where there is repairing paint.
8. Core setting process
8.1 The operator checks the quality of the sand core and sand mold before setting the core. The inspection items include the quality of the coating, the quality of the pouring riser, the air hole, the location of the live block, and whether there is serious loose sand.
8.2 Remove the accumulated paint on the core head of the sand core. Do not grind the core head of the lower box sand core. The sand core of the upper box can be slightly grind. The amount of sanding should be 1.5-2mm. When setting the core, keep the sand core level. There should be no protruding sand and sand blocks on the core head of the sand mold to prevent the sand core from rising up and unevenly. Pay attention to the wall thickness of the sand casting and check with a pallet if necessary. The sand cores that need to be bonded are firmly bonded with special repair paste, and then the box is closed after it is firmly.
9. Box closing process
Before closing the box, a special person should check the sand molds, mainly to check whether there are sand holes, lack of sand cores, and sand core positions in the sand molds. After qualified, use Φ4~6mm box sealing mud stick to seal the box. The box sealing mud stick should not be too close to the cavity and the pouring system. Some sand boxes do not need to be sealed.
When closing the box, check whether the sand box lining is complete and correct. The length of the two crane chains must be the same. The upper box should be in a horizontal position and there must be no tilt to prevent the occurrence of wrong box defects. When closing the box, the correct box closing pin must be used. It is strictly forbidden to close the box and punch the box without the box closing pin. Then seat the gate ring sand core, and the gate ring sand core shall not be reused.
After the box is closed, there must be a special person to inspect. The main inspection items are: whether the box is in place; whether the pouring riser is unobstructed; whether there is any part that has not been painted; whether the box is wrong; whether the gate ring position is correct, etc.
After the boxes are closed, the shift leader shall make statistics on the production quantity and variety of the shift, and fill in the production report and production signs. The production label includes the variety, quantity, and casting designation.
10. Organize the production site
The team leader organizes members to clean the site before get off work, and the production tools shall be placed in a stable manner according to management regulations, and they shall not be littered. The waste sand is removed to the specified location. Place paint and paint buckets in a safe area to prevent fire during pouring. You can leave work only after passing the above.
11. Modeling work instructions
11.1 Preparation before production
11.2 The operator reads the "casting process card" requirements, etc., and masters the process regulations and requirements.
11.3 Prepare the operating tools: sand ramming stick, gas eye stick, riser, ceramic runner, slag bag, cold iron, etc.
11.4 Keep the modeling bottom plate level and clean the debris on the modeling bottom plate before placing the wooden mold.
11.5 Check the geometric shape of the wooden mold, the mark of the live block, and the positioning of the pouring riser, and ask the technician if it is unclear.
11.6 Check the condition of the lifting device and spreader of the sand box, template and wooden mold to ensure the safe lifting operation.
12. Sand mold making
12.1 Molding of the template Place the sand box according to the positioning groove to ensure that the ears of the box are aligned to facilitate the box; determine the position of the sand box according to the structure of the wooden template. If more than two sand boxes are half-shaped, the bolts must be clamped between the sand boxes.
12.2 Place the pouring system (ceramic runner), riser and gas eye stick (outlet rope, etc.) according to the process regulations. When graphite chilled iron is to be placed, graphite blocks with a thickness and complete edges and corners that meet the process specifications should be selected for continuous laying without gaps. , Note that the graphite chilled iron should be spread 10-20mm away from the edge of the chilled surface.
12.3 In the process of modeling quicksand, use a sand ramming stick or hand to fill and compact at any time. Dead corners, under the live material and the pouring riser system should be filled one by one to ensure the compactness of the molding sand.
12.4 After the sand box is filled with molding sand, use a scraper to scrape it (the lower box does not need to be filled when the amount of sand is large), and properly pierce the air hole in the box to ensure that the air is unblocked and does not leak or escape.
12.5 After the sand mold is hardened, the mold is removed. When you need to knock the wood from the mold, you must use a wooden plank to pad it, and you should not directly knock the pattern. When picking the live material, you should use a wooden hammer and a sampling screw (bolt).
12.6 Carefully clean up the appearance after the mold is drawn, and adjust the material according to the "marks" of the live block, and find that the damaged part of the wooden mold is glued with white latex or apply to the technician for repair.
12.7 For the general damage of the sand mold, use resin sand to repair the part after inserting the nail or use the glue paste to fix it; the slight damage is repaired with paint paste. Repair the unevenness of the sand mold and the sand split formed by the interface of the live material, and grind the gaps.
12.8 Must ensure that the casting number (company logo) is clear, accurate and complete.
12.9 Clean the floating sand in the sand mold with a brush or compressed air.
13. Paint coating
13.1 Use paint types as required by technicians, such as zircon powder paint or composite paint.
13.2 The surface of the coating is smooth, without obvious brush marks, clear edges and corners, and no dust leakage (especially the umbilicus, ribs and dead corners).
13.3 The thickness of the coating should be 0.5~1mm, and the sand-adhesive parts should be painted at least twice. The pouring and riser system should be painted with the same paint as other working surfaces of the sand mold without missing.
13.4 Ignition and dry, check the missing paint and repaint and then ignite and dry.
13.5 Clean up the paint deposits to ensure that the sand molds are flat, sharp, and correct in size and shape. The casting number should be carefully cleaned to prevent paint accumulation.
14. Check
14.1 The shape and size of the mold, the placement of the cold iron, the air hole, the surface quality, the number of the casting, the shape and size of the pouring riser system, etc. according to the process drawing, process card, special work instruction, etc., and the customer feedback question special inspection form (detailed See "modeling process control program"), etc. for inspection (self-inspection) and processing.
14.2 After another member of the team has passed the inspection (mutual inspection) as described in the previous paragraph, the sculptor will mark the box with chalk.
14.3 The molder applies to the inspector for inspection and signs on the "casting processing route list".
14.4 Inspectors conduct inspections (special inspections) and mark "O" if they are qualified, and mark "N" if they are unqualified.
14.5 For the qualified sand molds that can be repaired, the molder shall apply to the technician for repair, and after approval, repair and re-inspect.
14.6 The unqualified products found by the inspector during the patrol inspection shall be identified in time and handled in accordance with relevant procedures.
15. Core-making work instructions
15.1 Preparation before production
15.2 The operator reads the "casting process card" or "special work instruction" requirements, etc., and masters the process regulations and requirements.
15.2 Prepare the operating tools: sand tamping stick, eye stick (nylon air duct), scraper, core bone, nose, etc.
15.4 Check the positioning of the core box frame, the "marks" between the bottom plate and the filler, and if you are unclear, ask the technician in time.
15.5 Clean up the debris in the core box and clamp the core box tightly.
15.6 Check the core board, core box spreader, etc. to ensure safe lifting operation.
16. Make sand core
16.1 The core box is placed on an iron plate or flat ground.
16.2 When pouring no-bake resin sand into the core box, use a sand ramming rod or hand to fully tighten and fill the dead corners and under the live material to ensure the compactness of the sand core.
16.3 The type, size and location of core bone and core nose are appropriate and can ensure the safety of sand core lifting. The core bone should be greater than 20mm from the core surface.
16.4 The size, position and direction of the air passage (eye) are correct, and the surface from the core should be greater than 20mm. Measures should be taken to ensure that the gas in the sand core can be quickly discharged during pouring, so that excessive gas pressure in the core will not overflow into the cavity through the surface of the sand core and cause defects such as porosity and fire choking in the casting.
16.5 Scrape and compact the sand-filled surface with a sand scraper. If the direction of the air is exhausted, the eye should be pierced.
16.6 The core box can be lifted and removed only after the sand core is hardened. Wooden hammers and sampling screws (bolts) should be used when drawing the mold. Metal tools are not allowed to strike the core material directly.
16.7 Clean the sand on the surface of the wood and adjust the material according to the "marks". If the core box material is found to be damaged, glue it with white latex or apply to a technician for repair.
16.8 The general damage of the sand core can be repaired by inserting nails and then repaired with resin sand or glued off with an adhesive; slight damage should be repaired with paint paste.
16.9 Repair the sand cores, dislocation of ribs, uneven surfaces, and sand splits formed by the filler interface, and dig out the core nose, and grind the fillet fillet according to the process requirements.
16.10 The casting number (company logo) must be clear, accurate and complete.
16.11 Use a brush or compressed air to clean the floating sand on the sand core.
17. Use and maintenance of wooden molds
"Wood mold maintenance and management regulations" should be implemented.
The operator should clean up the wooden mold and working environment in time to keep the working environment civilized and clean
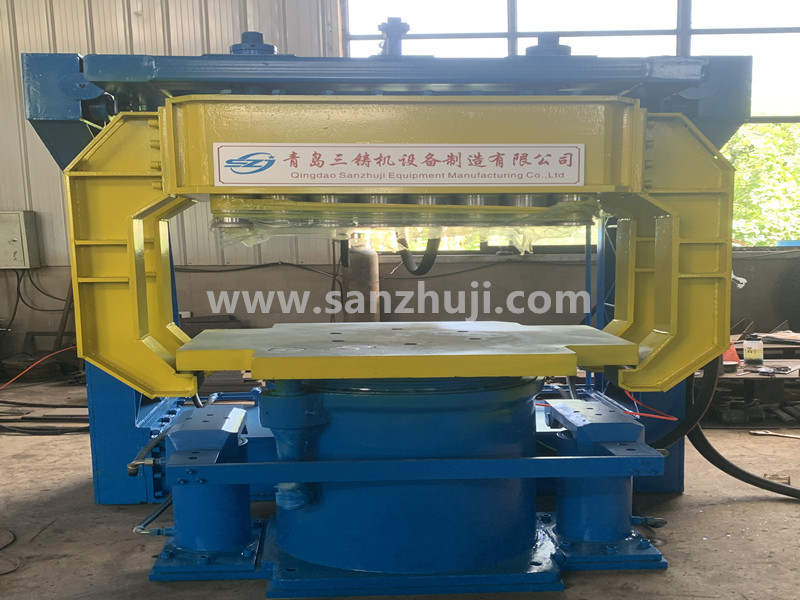
Qingdao Sanzhuji Equipment Manufacturing Co., Ltd. specializes in the production of sand reclamation equipment,foundry machines,Sand casting equipment,GS high efficiency rotary mixer,no-bake resin sand mixer,Jolt squeeze molding machine/Jolt-squeezing moulding machines,Multi- Piston Moulding Machine/Hydraulic multi-piston moulding machine,foundry molding machine,flaskless moulding machine,shot blasting machine,dust collector,according to the amount of old sand recovered Carry out plan customization, and provide sand reclamation equipment installation, commissioning, and training. Welcome guests to visit the factory.